Tag: Training

  • Easy guide to lime juice – fresh lime, Roses cordial and the Gimlet

    Easy guide to lime juice – fresh lime, Roses cordial and the Gimlet

    Is all Lime Juice the same?

    There seems to be some confusion for the newly enthusiastic home bartender as to what exactly is meant by lime juice – do we literally mean only the freshly squeezed juice of a lime or could you use one of the green lime bottles littering the shelves at the supermarket?

    Why use lime at all?

    When we make cocktails we are aiming to take a selection of different ingredients and mix them together, producing something that (hopefully) tastes better than when we started. To get good flavours we need to make balanced use of some of the 5 primary tastes – sour, sweet, salty, bitter, and umami. I’ll go into a detailed explanation of each of these in an upcoming post but for now we are interested in the main taste associated with lime – sourness.

    When drinking freshly squeezed lime juice you notice a strong sour taste on your tongue – this is because limes contain a relatively high level of citric acid which our bodies note as being sour. A sour acidic flavour, when balanced with other tastes (such as sweetness from sugar) adds to the overall depth of the cocktail so if we use it correctly we can give our drinks a crisp, refreshing flavour.

    Fresh squeezed Lime

    Fresh lime is easily the most important lime for us – the vast majority of cocktails that you’ll come across on this blog referring to lime juice are asking for freshly squeezed lime juice. Buy a bunch of limes from your local grocer, wash them, cut them in half and squeeze with a citrus press or reamer to extract all the juicy, natural goodness. Real, fresh limes will provide the acidic bite that we are looking for and provide a more natural flavour in the final drink.

    Depending on where you live these can be pretty costly so try and buy a citrus press to make sure you can get as much juice as possible out of each lime. A tip; use the palm of your hand to push on the lime and roll it around on your bench a few times before juicing and you’ll get more out of it. Expect to get around 15ml juice per half lime/ 30ml per lime.

    ‘Fresh’ Lime bottles

    Often found in the soft drink section of your local convenience store or supermarket, these squeezed lime bottles tend to contain concentrated lime juice that has commonly had preservatives and other bits and pieces added. While these bottles may save a few seconds over the hand-squeezing of a real lime, unfortunately they tend to fail on the taste test, generally lacking the true sour or acidic bite as fresh lime juice and are therefore best left on the shelf.

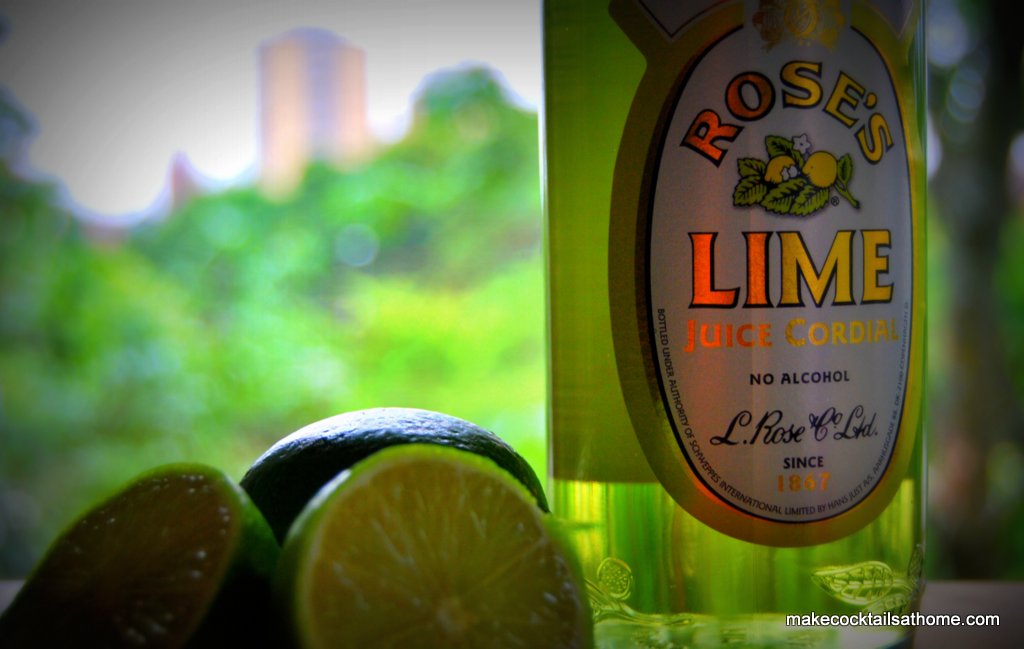
    Roses Lime cordial, other brands of Lime cordials

    Lime cordials were originally a mix of concentrated lime juice and sugar although the ingredient list on many modern bottles seems to have grown somewhat with a mix of added preservatives and colourings. Hmm. But anyway…

    The original and best known is Rose’s lime cordial, invented by a Mr Lauchlin Rose in 1867 in part as a way to help British sailors in their fight against scurvy, a nasty disease bought on by a diet lacking vitamin C.

    Sensible medical types had discovered that limes and other citrus fruits were a good natural source of vitamin C and therefore helped in the fight against scurvy and quickly pushed for laws to ensure that all ships carried a ready supply of citrusy goodness for their sailors. While good in theory, problems arose quickly – citrus fruits were not always easy to source, and even when you could find them they were not particularly appetising when they’d been stored in the hold of a ship for a few weeks. Added to this, drinking straight lime juice is not particularly appealing at the best of times and while it could (and was) made more attractive by adding it to the daily rum or gin rations it was still something to be drunk out of necessity rather than choice. Time for Mr Rose.

    Lauchlin Rose had a business supplying provisions for ships and after a bit of experimentation discovered that a mix of concentrated lime juice with sugar allowed him to create a cordial which would provide the necessary vitamin C but in a sweetened, more palatable form than simple lime juice. Added to this the lime and sugar combination was stable when bottled and could be stored for lengthy periods without going off. Created just in time for the Merchant Shipping Act of 1868, which made the carrying of citrus a legal requirement, Rose was on to a winner.

    Nothing is perfect however. The sugar that helped so much in creating the cordial is often its downfall when used in cocktails. Remembering from earlier, the main reason we use limes in good cocktails is to add an acidic bite from the citric acid contained in the juice. Unfortunately the sugar that is used to help stabilise the cordial weakens this acidity, ultimately giving a kind of sweet general lime flavour but without the acid that we really want. This results in an unbalanced and (often) unpleasant drink when compared to fresh squeezed lime.

    Conclusion

    Unless specifically stated, use freshly squeezed lime juice for cocktails – your drinks will taste better. Avoid buying pre-squeezed as squeezing by hand will result in better juice and a better drink.

    Lesson – Making a Gimlet

    A real classic cocktail now, we are going to start by going against what I’ve just been telling you and using Rose’s cordial rather than fresh lime.

    .

    You will need

    • 50ml Gin
    • 20ml Roses Lime Cordial


    Method

    Stir in glass

    Nice and easy, this can be made in the glass or stirred in your mixing glass and strained into a cocktail glass. We are going to do the ‘stir in glass’ method today.

    Take a rocks glass, old fashioned glass or similar and fill with ice. Measure in your gin and lime cordial and use your bar spoon to stir the ice and liquid until it is well mixed and cold – this should take around 30-40 seconds. Garnish with a lime slice and drink, feeling happy in the knowledge that you are tackling the fight against scurvy head-on.

    Finished Gimlet
    Finished Gimlet

    .

    Variations to try

    After making a traditional Gimlet, make another but replace the Roses lime cordial with freshly pressed lime juice. Prepare in the same manner and taste the difference. You should notice that the new fresh lime Gimlet is very sour from the citric acid in the lime juice. To improve the taste add a small amount of simple syrup and stir – the sugar should help bring the drink back into balance and improve the overall taste.

    There you go – more than you’d expect to read about lime juice on any given day. Try making the drinks and let me know in the comments section how they turned out.

    .

    // David

  • Mixing Cocktails 101 – The Methods – Shake and Strain

    Mixing Cocktails 101 – The Methods – Shake and Strain

    Shake and Strain

    For more info about bar equipment check out the ‘Essential Equipment for your home bar’ blog post

    Post contents

    Depending on the ingredients used and the overall effect we are seeking there are a number of mixing methods that we can use to make cocktails. We’ve covered built drinks already and today we’re going to look at the most visible – shaking.

    Shaking and cocktails appear to go hand in hand – it often seems like anytime more than two ingredients are involved they have to be tossed into a tin and shaken around by an enthusiastic bartender. Shaking is an aggressive mixing motion and helps us to mix and chill multiple ingredients quickly and efficiently. The aggressive nature of shaking means that getting the correct technique is very important.

    Technique

    You can start by setting your mixing glass on a table, giving yourself enough room to work.

    Add your ingredients

    Add your ingredients (whiskey, lemon, syrups etc) into the mixing glass, being careful to measure for the correct amounts.

    Fill the mixing glass with ice – we add the ice last to minimise dilution.

    Place the shaker tin on top of mixing glass, being careful to have a slight angle to avoid a ‘perfect seal’ (which is a real pain in the wherever to try and get off) and give a nice, hard tap to seal the glass and the shaker.

    Ready for some shaking
    Ready for some shaking

    Start shaking

    Hold the shaker, ensuring you have a solid grip of both the mixing glass and the shaker tin (we don’t want to let go by mistake!), and shake hard in nice big movements allowing the ice to travel from one end of the shaker to the other. The further the ice travels the better as it will mix and cool the drink faster – you’ll hear a ‘clack clack’ sound as the ice hits each end of the shaker if you’re doing this correctly.

    .

    How to shake a drink

    Continue shaking hard until you have the right level of cooling and dilution – the exact time depends on the style of drink, but around 10-12 seconds will usually be good. If you’ve shaken hard enough then there should be condensation on the shaker tin.

    Separate the shaker and mixing glass

    Now its time to separate the shaker. Hold the shaker tin in one hand and use the palm of your other hand to give a hard ‘tap’ on the tin where the mixing glass and shaker meet. This should break the seal and allow you to lift the mixing glass off and away.

    Time for a taste test

    Now it’s time to taste test the cocktail. Use your finger to cover the end of a straw and dip it into the cocktail so that you can get some liquid to taste. You want to check whether the cocktail tastes balanced (the right levels of sweet/sour/bitter) and make sure the flavours are correct. If you need to make any adjustments then do so now and either stir or give another quick shake.

    The cocktail tastes good (of course!) so it’s time to transfer the drink from the shaker to a glass.

    Ice in your glass?

    Check your recipe to see whether you need to fill your destination glass with ice (if you’re using a Collins or an Old Fashioned, you will probably need to). If you do, fill it right to the top, as more ice = colder drinks.

    Strain and pour

    You can use your Hawthorne strainer to pour your drink into the glass without any ice or other junk in the shaker following along for the ride. If you are pouring into a cocktail glass, you won’t be using icing the glass, so you can double or fine strain by pouring through a tea strainer placed between the Hawthorne strainer and the glass – this will help collect any small pieces of ice or fruit that and make the cocktail look better.

    Finish off by adding your garnish and a straw (if necessary).

    All done!

  • Mixing Cocktails 101 – The Methods – Build

    Mixing Cocktails 101 – The Methods – Build

    The Built Cocktail

    When it comes to making quick and easy cocktails, there is nothing faster than a built drink.

    As the name suggests, building a cocktail is a process of adding one ingredient after the other and stacking them straight into the glass, no shaking or straining necessary.

    When do we build cocktails?

    We use the built drink mixing method to make cocktails that do not need the extra cooling, mixing or dilution that the other more aggressive mix methods give us – it works best with ingredients that will mix together easily.

    Built drinks are often long drinks (served in highball or Collins glasses) and will normally have few ingredients.

    The easiest order to make a built drink at home is:

    Non alcoholic ingredients -> Spirits & Liqueurs -> Ice -> Mixer -> Garnish/Straw

    How to Build

     Non-Alcoholic Ingredients

    Start by adding the non-alcoholic ingredients (lemon or lime juice, syrups etc) to the glass first. Alcohol is pricey [well it is here in Sweden anyway…] so this way if you make a mistake with the measures of syrups or juices you’re not going to have to throw any precious booze away.

    Alcohol

    Once the non alcoholic ingredients are in the glass it’s time to add the spirits and liqueurs. Remember to use a measure to ensure the correct amount of booze goes into your cocktail as we want these drinks to taste good and that’s only going to happen if our proportions are correct.

    Ice

    Non-alcohol and alcohol are now in the glass so it’s time to add ice. Remember that for most drinks (especially those in Highball or Collins glasses) we want to add as much ice as possible as this will slow down the dilution and also stop us from adding to much mixer.

    Mixer

    With the glass stacked with ice we can now add the mixers/lengthening ingredients (soda, coke, fruit juices etc). If you are making a long drink then pour the mixer until about ½ cm from the top of the glass – if the glass is too full then you’re more likely to spill.

    Finish

    Use your bar spoon to carefully give the drink a stir, add your garnishes and straws as necessary and you’re ready to serve.

    Build cocktail example:

    Cuba Libre (click link for full cocktail recipe)

    Start with non-alcoholic ingredients
    Start with non-alcoholic ingredients
    Carefully measure the alcohol
    Carefully measure the alcohol
    Pour the alcohol into the glass
    Pour the alcohol into the glass
    Add ice, mixer, garnish and you’re done
    Add ice, mixer, garnish and you’re done

    Non alcoholic ingredients -> Spirits & Liqueurs -> Ice -> Mixer -> Garnish/Straw.

    Lime juice -> Cuban style Rum -> Ice -> Coca Cola -> Lime wedge and straw

    Next Steps

    The next mixing lesson in the series is is shake and strain. Let me know if you have any questions or comments.

    .

    //David

  • Essential Guide to Home Cocktail Bar Glassware

    Essential Guide to Home Cocktail Bar Glassware

    Glassware

    We’ve looked at the essential bar tools and the essential ingredients that you need to stock your home bar, so  now is the perfect time to look at glassware.

    Using the right glass for each cocktail is very important. Different glass shapes can help bring out and accentuate certain qualities of a cocktail including the aroma and flavour and having the right size will also ensure that the drinks you’re preparing will fit correctly and not leave you with too much/little liquid.

    Bars generally have the luxury of larger budgets than us at home and can afford to buy many different types of glasses (including some pretty exotic ones). These fancy shapes and styles look great but are luckily are not necessary for your home bar.

    If you want to make cocktails on a realistic budget you’ll be able to make a huge variety with just the following glassware.

    Highball/Collins

    Buy Collins Glasses
    A Collins is a tall glass tumbler that usually holds around 300-400ml (10-14oz)– a highball is similar in size but is usually a little taller and more narrow and for home use you can usually interchange the two. An ice filled Collins is the perfect size for the Tom Collins or any of the Collins family of drinks (hence the name) but will also hold the majority of our long cocktails, so named due to the long glass, and also spirit-and-mixer style combinations such as your gin ‘n’ tonics, rum and cokes or whatever your particular drink of choice happens to be.

    Example: Tom Collins, Mojito, Cuba Libra

    .

    Old Fashioned/Rocks

    Buy Rocks Glasses
    Another glass named after a drink (in the case the amazing Old Fashioned, a definite bartender favourite).

    Shorter and wider than a highball or Collins, the shape allows the aroma of the drink to display more than it would in something more narrow.

    An Old Fashioned glass is commonly used to serve short drinks ‘on the rocks’, which means alcohol with ice (and gives us the other common name for the glass – Rocks), or neat, where the alcohol is served in the glass without ice, often seen in the case of spirits  likewhiskey.

    A standard Old Fashioned glass holds between 180-300ml (6-10oz) but it’s also easy to find glasses that are bigger, often between 300-400ml in which case they could actually hold the same amount of liquid as a Collins or Highball glass.

    Example: Old Fashioned, Bramble, Whiskey Sour

    .

    Shot Glass

    Buy Shot Glasses
    A shot glass is a small glass, usually holding somewhere between 25ml-100ml, that is most commonly used for a single or double measure of alcohol, or shot, often intended to be consumed in one go (like the Tequila/Lime/Salt deal commonly served as a bit of liquid energy in bars around the world.

    Example: B52, Tequila Slammer

    .

    Cocktail (Martini)

    Buy Cocktail/Martini Glasses
    Commonly, and incorrectly (if we are to be technical about it) referred to as a Martini glass after the famous cocktail that is commonly served in it.

    The cocktail glass, with its thin stem and delicate bowl, is a great mix of form and function. The stem gives us the ability to hold the glass without transferring our body heat and inadvertently warming the chilled drink inside; the bowl shape allows us to take in the aromatic scents of the spirit, liqueurs and garnishes as we raise it to our mouth.

    Early cocktails glasses held around 100ml (3 or 4oz) as drinks served in cocktail glasses are usually served without ice – this small size allowed you to finish your drink while it was still cold. Modern cocktail glasses tend to be larger at around 200ml and most of our recipes reflect this larger sizing – you can use smaller glasses if you have them, but if you follow modern recipes then expect some leftovers.

    Example: Dry Martini, Manhattan, Cosmopolitan

    .

    Brandy Balloon/snifter

    Buy Brandy Glasses
    The Brandy Balloon, or snifter, is used to serve neat spirits such as brandy or whiskey, and usually holds somewhere between 180-300ml of liquid. We tend not to fill the glass and only put a small amount of liquor in, usually a single or double measure (so around 25-75ml).

    The shape, wide at the bottom and more narrow at the top, gives the liquid a larger surface area which allows it to evaporate slightly faster, while the narrow part at the top of the glass works to catch the aroma it gives off. The glass has a stem but this tends to be used for the opposite reason we have a stem in cocktail or wine glasses – with a balloon we actually hold the bottom of the glass, using the heat of our hands to warm the liquor inside the glass which is thought to improve the flavours in some spirits.

    Example: Stinger

    .

    Sparkling Wine/Champagne Flute

    .
    Buy Champagne Flute Glasses
    The sparkling wine glass, or Champagne flute as it tends to be known (remembering that Champagne is a particular type of sparkling wine from France) is used for sparkling wine, sparkling wine cocktails or other drinks that we want to remain nice and fizzy.

    The tall, narrow shape of the glass reduces the surface area of the wine and helps it keep its carbonation (the ‘fizzyness’ if you will), and the stem allows the wine to remain nice and cold. A standard flute tends to hold around about 180ml (6oz).

    Example: Bellini, French 75, Classic Champagne Cocktail

    .

    Wine Glass

    Buy Wine Glasses
    One that you’re likely to have at home already, we also use standard wine glasses for cocktails. As with the cocktail glass and Champagne flute, the stem on the wine glass stops our heat of our hand warming the liquid. Standard wine glasses hold anywhere from around 175-250ml.

    Example: Cobbler, Spritzer

    That’s it for glassware basics. Let me know if you have any questions or queries and once you’re ready be sure to check out Mixing Cocktails 101 – the guide that explains the methods and reasons behind cocktail mixing methods including shaking, building, stirring and layering.

    //David