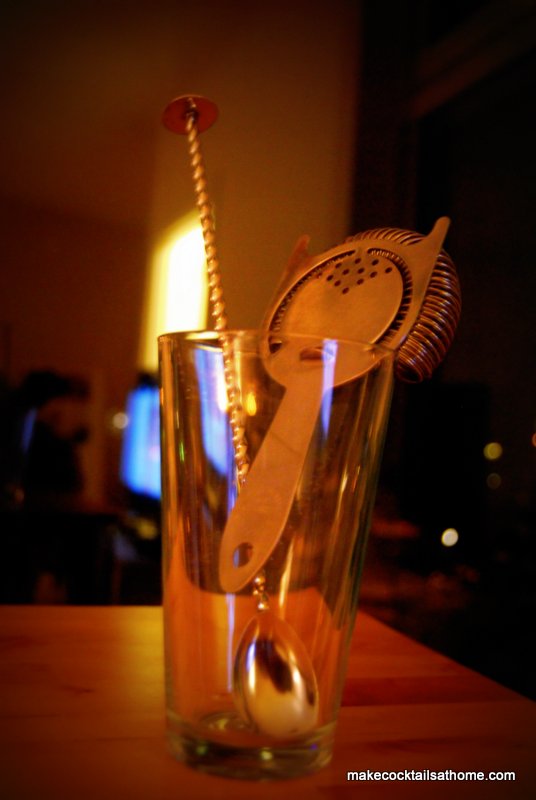
Category: Mix Methods

  • Mixing Cocktails 101 – How to stir a cocktail

    Mixing Cocktails 101 – How to stir a cocktail


    The proper way to stir a cocktail

    For more info about bar equipment check out the ‘Essential Equipment for your home bar’ blog post

    Time for the next post in my series on mixing methods, and today we’re going to take a look at stirring, or stirred,  cocktails.

    I’ve previously covered shaking, an aggressive action we use when we need to mix ingredients that that differ greatly in consistency (mixing spirits, juices and syrups together for example), but what if we are using simpler ingredients?

    If we are simply mixing two types of clear alcohol together (such as gin and vermouth) then the aggressive nature of shaking  is really more than we need- it  will ruin the appearance of the drink by making it cloudy,  and the small chips of ice that break off during the shaking action can also add often unwanted dilution to the drink.

    Instead, we’re going to treat this cocktail with respect – be gentle, and stir.

    Technique

    You will need:

    • Mixing glass (part of your shaker set)
    • Bar spoon

    Take your (clean) mixing glass and fill it with (clean) ice.

    Using a measure for accuracy pour in the ingredients from your cocktail – for example if you are making a Martini, pour in measured amounts of gin and vermouth.

    Now you have the ingredients in the ice it’s ready to mix.

    It’s time to grab your bar spoon. Ever wondered why it was so long? Well, wonder no more – the extra length lets us get right to the bottom of a mixing glass to the precious, precious alcohol.

    Carefully push the ‘spoon’ end of your barspoon down the side of the glass right down bottom, holding the base of the mixing glass steady with one hand.  Stir the spoon around in a gentle circular motion making sure that the ice and liquid  move around almost silently – we want a smooth mixing action, we’re not trying to smash the spoon through the ice.

    Continue stirring until the drink is mixed – you may read ridiculous things in fancy guides like “stir clockwise 27 times” but really the mount you need to stir will depend on how fast you are stirring, and in general it will probably take around 30 seconds. The most important thing to remember is that we are stirring for a reason – we want to make the ingredients mix and the drink temperature nice and cold – so we will be finished when we have accomplished these two goals.

    Mixed and cold, it’s time to move the drink into our glass. Grab your Hawthorne strainer (or a Julep strainer if you have one), fit it over the top of your mixing glass and carefully pour your cocktail into it’s new home.

    Done.  Now be a good bartender – rinse your equipment – then take a seat, relax, and enjoy your beautiful stirred cocktail.

    / dave

  • Mixing Cocktails 101 – The Methods – Shake and Strain

    Mixing Cocktails 101 – The Methods – Shake and Strain

    Shake and Strain

    For more info about bar equipment check out the ‘Essential Equipment for your home bar’ blog post

    Post contents

    Depending on the ingredients used and the overall effect we are seeking there are a number of mixing methods that we can use to make cocktails. We’ve covered built drinks already and today we’re going to look at the most visible – shaking.

    Shaking and cocktails appear to go hand in hand – it often seems like anytime more than two ingredients are involved they have to be tossed into a tin and shaken around by an enthusiastic bartender. Shaking is an aggressive mixing motion and helps us to mix and chill multiple ingredients quickly and efficiently. The aggressive nature of shaking means that getting the correct technique is very important.

    Technique

    You can start by setting your mixing glass on a table, giving yourself enough room to work.

    Add your ingredients

    Add your ingredients (whiskey, lemon, syrups etc) into the mixing glass, being careful to measure for the correct amounts.

    Fill the mixing glass with ice – we add the ice last to minimise dilution.

    Place the shaker tin on top of mixing glass, being careful to have a slight angle to avoid a ‘perfect seal’ (which is a real pain in the wherever to try and get off) and give a nice, hard tap to seal the glass and the shaker.

    Ready for some shaking
    Ready for some shaking

    Start shaking

    Hold the shaker, ensuring you have a solid grip of both the mixing glass and the shaker tin (we don’t want to let go by mistake!), and shake hard in nice big movements allowing the ice to travel from one end of the shaker to the other. The further the ice travels the better as it will mix and cool the drink faster – you’ll hear a ‘clack clack’ sound as the ice hits each end of the shaker if you’re doing this correctly.

    .

    How to shake a drink

    Continue shaking hard until you have the right level of cooling and dilution – the exact time depends on the style of drink, but around 10-12 seconds will usually be good. If you’ve shaken hard enough then there should be condensation on the shaker tin.

    Separate the shaker and mixing glass

    Now its time to separate the shaker. Hold the shaker tin in one hand and use the palm of your other hand to give a hard ‘tap’ on the tin where the mixing glass and shaker meet. This should break the seal and allow you to lift the mixing glass off and away.

    Time for a taste test

    Now it’s time to taste test the cocktail. Use your finger to cover the end of a straw and dip it into the cocktail so that you can get some liquid to taste. You want to check whether the cocktail tastes balanced (the right levels of sweet/sour/bitter) and make sure the flavours are correct. If you need to make any adjustments then do so now and either stir or give another quick shake.

    The cocktail tastes good (of course!) so it’s time to transfer the drink from the shaker to a glass.

    Ice in your glass?

    Check your recipe to see whether you need to fill your destination glass with ice (if you’re using a Collins or an Old Fashioned, you will probably need to). If you do, fill it right to the top, as more ice = colder drinks.

    Strain and pour

    You can use your Hawthorne strainer to pour your drink into the glass without any ice or other junk in the shaker following along for the ride. If you are pouring into a cocktail glass, you won’t be using icing the glass, so you can double or fine strain by pouring through a tea strainer placed between the Hawthorne strainer and the glass – this will help collect any small pieces of ice or fruit that and make the cocktail look better.

    Finish off by adding your garnish and a straw (if necessary).

    All done!

  • Mixing Cocktails 101 – The Methods – Build

    Mixing Cocktails 101 – The Methods – Build

    The Built Cocktail

    When it comes to making quick and easy cocktails, there is nothing faster than a built drink.

    As the name suggests, building a cocktail is a process of adding one ingredient after the other and stacking them straight into the glass, no shaking or straining necessary.

    When do we build cocktails?

    We use the built drink mixing method to make cocktails that do not need the extra cooling, mixing or dilution that the other more aggressive mix methods give us – it works best with ingredients that will mix together easily.

    Built drinks are often long drinks (served in highball or Collins glasses) and will normally have few ingredients.

    The easiest order to make a built drink at home is:

    Non alcoholic ingredients -> Spirits & Liqueurs -> Ice -> Mixer -> Garnish/Straw

    How to Build

     Non-Alcoholic Ingredients

    Start by adding the non-alcoholic ingredients (lemon or lime juice, syrups etc) to the glass first. Alcohol is pricey [well it is here in Sweden anyway…] so this way if you make a mistake with the measures of syrups or juices you’re not going to have to throw any precious booze away.

    Alcohol

    Once the non alcoholic ingredients are in the glass it’s time to add the spirits and liqueurs. Remember to use a measure to ensure the correct amount of booze goes into your cocktail as we want these drinks to taste good and that’s only going to happen if our proportions are correct.

    Ice

    Non-alcohol and alcohol are now in the glass so it’s time to add ice. Remember that for most drinks (especially those in Highball or Collins glasses) we want to add as much ice as possible as this will slow down the dilution and also stop us from adding to much mixer.

    Mixer

    With the glass stacked with ice we can now add the mixers/lengthening ingredients (soda, coke, fruit juices etc). If you are making a long drink then pour the mixer until about ½ cm from the top of the glass – if the glass is too full then you’re more likely to spill.

    Finish

    Use your bar spoon to carefully give the drink a stir, add your garnishes and straws as necessary and you’re ready to serve.

    Build cocktail example:

    Cuba Libre (click link for full cocktail recipe)

    Start with non-alcoholic ingredients
    Start with non-alcoholic ingredients
    Carefully measure the alcohol
    Carefully measure the alcohol
    Pour the alcohol into the glass
    Pour the alcohol into the glass
    Add ice, mixer, garnish and you’re done
    Add ice, mixer, garnish and you’re done

    Non alcoholic ingredients -> Spirits & Liqueurs -> Ice -> Mixer -> Garnish/Straw.

    Lime juice -> Cuban style Rum -> Ice -> Coca Cola -> Lime wedge and straw

    Next Steps

    The next mixing lesson in the series is is shake and strain. Let me know if you have any questions or comments.

    .

    //David

  • Mixing Cocktails 101 – The Methods – Overview

    Mixing Cocktails 101 – The Methods – Overview

    Shaken or Stirred?

    When we mix cocktails we are usually trying to do two things – take different ingredients and combine them to make new tastes and flavours; and use ice to cool the ingredients and the final drink.

    Some ingredients will mix together easily while others are more of an ‘oil and water’ situation where simply pouring them in the same glass will not be enough; depending on how much mixing is required we use the mixing method that will give us the best result, anywhere from simply pouring all the ingredients into the glass (building method, used with easily mixed ingredients) through to a long hard shake (shake and strain method) which uses your energy and the ice to smash and mix harder ingredients together.

    The four main mixing methods we use are :

    Each of these methods can be used to make cocktails and which one you decide to use will depend on how much mixing and cooling is required – building is the most gentle method and they become progressively more intense as we work our way down to blending.

    There are a few more mix methods that we use for slightly more specific functions:

    • Layering
    • Dry Shaking
    • Rolling

    Don’t worry about these for now as they are used for slightly different reasons (we’ll cover them later).

    So when do we stir? When do we shake?

    In general, the more simple the ingredients in a cocktail the less mixing it will need. For example – a Martini is made of only two clear ingredients, gin and dry vermouth [I realise that some old recipes call for orange bitters and such but I’m keeping this simple for now]. Gin is the base spirit and contains around 40% abv, vermouth is also alcoholic so simply stirring the two ingredients in an ice filled mixing glass will allow them to mix nicely and chill down.

    When we start adding juices, syrups, liqueurs and such then we need to get a little more aggressive and this is when we’ll want to shake the drink.

    Example – In a Classic Daiquiri we are mixing rum, fresh lime juice and sugar together – we could stir these ingredients but it would take a long time for them to mix and cool to a satisfactory level. Instead we can add them into a shaker, fill the shaker with ice and shake hard – the ice will help to agitate the ingredients inside the shaker, helping them to mix together while also cooling them down. For a frozen daiquiri we would need to be even more aggressive, so instead of shaking we would move to blending.

    Clear ingredients – easier to mix – build or stir

    Juices, syrups, liqueurs, milk and similar ingredients – harder to mix – shake or blend

    Of course a lot of this really comes down to personal preference – I’ve certainly served my fair share of shaken Vodka Martinis during my time on the bar so feel free to experiment and see what you like most.

    So it’s all about mixing and cooling, right?

    Actually, it’s a little more complicated than that. There are more elements making up the taste of a cocktail than just the initial raw ingredients; the final product is also going to be a result of the cocktails dilution, texture and appearance, all of which can also be manipulated through the mixing method chosen.

    Dilution

    Dilution is the amount of water that is in your cocktail as a result of ice melting. Many people seem to think that water is the enemy of cocktails but it is actually an important ingredient in itself as it can help soften the flavour of the alcohol and allow background flavours to be more apparent.  Think of the Mojito; if you didn’t have the crushed ice melting and diluting the cocktail the rum flavour would be much stronger and it would be harder to appreciate the mint, sugar and lime flavours that make the cocktail special.

    How much dilution you get is directly related to how much ice melts (which is also directly related to how cold the cocktail becomes as you cannot chill the cocktail with melting). The speed at which ice melts is related to the surface area of the ice [check out ‘Cocktail Science – Does crushed ice dilute more? a great blog with a full ‘sciency’ explanation of all this] so the smaller the ice cube = the faster it melts = the more it will dilute your cocktail.

    Crushed ice will dilute more than large ice cubes so keep this in mind when you are making your cocktails – this is why we use large ice cubes when we stir or shake. More ice = a colder drink = slower melting, which is why we always try to fill our glasses with ice when we are making drinks; we are trying to minimise unnecessary dilution.

    Also, when we shake hard the ice in the shaker will chip into small pieces that will dilute the cocktail more – if you straining into a cocktail glass after a hard shake then you can use a tea strainer (fine strainer) to catch these little ice shards and at the same time make the cocktail look a little nicer.

    Appearance

    If you shake clear ingredients then you often end up with a cloudy looking drink so you can also keep this in mind when deciding which mix method to use. A stirred Martini will look clear and refreshing when placed next to its cloudy, shaken counterpart.

    Cloudy ingredients usually need more aggressive mixing and this can actually improve the appearance of the cocktail with some ingredients – things like pineapple juice, coffee, eggs or crème can create foams and layers when shaken that can really add to the overall appearance of the drink.

    Texture/Mouth Feel

    Finally, the mixing method you select can also play a part in the texture or mouth feel – how the drink actually feels in your mouth; light, heavy, creamy, oily etc.

    Just like whisking an egg, heavier ingredients, juices, crèmes and similar will often fluff up and become soft and foamy in texture when they have been shaken. In fact many cocktails will actually use egg whites shaken hard for exactly this reason [we’ll cover this more in depth in a later post].

    Example – A French Martini (Chambord liqueur, vodka and pineapple juice) that is stirred will feel a bit dull and watery, but if it is shaken hard then the pineapple juice will expand and foam giving the cocktail a much more appealing texture when you taste it.

    Next up

    That’s a general overview of why we use different mixing methods, now it’s time to learn about the actual mechanics behind each of the methods (how to stir, how do you actually use a shaker to shake etc). We’ll start with a look at how we build cocktails.

    Any questions then feel free to either leave a comment below or contact me,

    // David